Handling form validation in React Native can be a challenging task.
Luckily, there are powerful libraries available, such as Formik and Yup, that can streamline the process and make form validation a breeze. In this blog post, we will explore how to use Formik and Yup together to create robust and efficient form validation in React Native. We will be using useFormik hook provided by Formik for this implementation.
What is Formik?
Formik is a popular form management library for React and React Native. It simplifies form handling by providing utilities for form state management, input validation, and form submission. Formik's declarative API makes it easy to manage form values, errors, and submissions.
What is Yup?
Yup is a JavaScript library for schema validation. It allows you to define a validation schema for your form inputs and perform validation checks easily. Yup provides a powerful and expressive API for defining validation rules and error messages.
Installing Formik and Yup
yarn add formik yupCreating a form with Formik
Let's create a basic sign-up form using Formik. Start by importing the necessary components and libraries:
import React from "react";
import { View, TextInput, Button } from "react-native";
import { useFormik } from "formik";
import * as Yup from "yup";
We will have a Name & Password field as well as a confirm password field. Let's add the initial values of the input fields.
const initialValues = {
  name: "",
  password: "",
  confirmPassword: "",
};
Now, let's create a form with Formik and add validations with yup.
const { handleChange, handleSubmit, handleBlur, errors, values, touched } =
		useFormik({
			validationSchema: Yup.object().shape({
				name: Yup.string()
					.trim()
					.min(2, "Name must contain at least 2 characters")
					.required()
					.label("Name"),
				password: Yup.string()
					.trim()
					.min(3, "Password must contain at least 3 characters)
					.required()
					.label("Password"),
				confirmPassword: Yup.string()
					.trim()
					.min(3, "Password must contain at least 3 characters)
					.required("Password is a required field")
					.oneOf([Yup.ref("password"), null], "Passwords must match")
			}),
			validateOnBlur: true,
			validateOnMount: false,
			initialValues,
			onSubmit: handleSignUp
		});

    return (
     <>
        <TextInput
          placeholder="Enter name"
          value={values.name}
          onChangeText={handleChange("name")}
          onBlur={handleBlur("name")}
        />
        <TextInput
          placeholder="Enter password"
          value={values.password}
          onChangeText={handleChange("password")}
          onBlur={handleBlur("password")}
        />
        <TextInput
          placeholder="Confirm password"
          value={values.confirmPassword}
          onChangeText={handleChange("confirmPassword")}
          onBlur={handleBlur("confirmPassword")}
        />
        <Touchable onPress={handleSubmit}>
          <Text>Sign Up<Text/>
        <Touchable/>
     </>
    )
And add the handleSignUp method which will console log the form values when submitting the form:
const handleSignUp = (values) => {
  console.log(values);
};
Here is an explanation of the methods used:
validationSchema: Specifies the validation rules for each form field using Yup. The Yup.object().shape() method is used to define the validation schema. It includes validations such as minimum length, required fields, and matching passwords.validateOnBlurandvalidateOnMount: These methods determine when form validation should be triggered. In this case, validation occurs on blur (when the user moves away from an input) and not on mount (when the component is first rendered).onSubmit: Specifies the function to be executed when the form is submitted. In this case, the function handleSignUp is called.values: Object containing all the form values.
Inside the component's render function, the form fields are rendered using the TextInput component with the necessary props and methods.
Here is what we have right now:
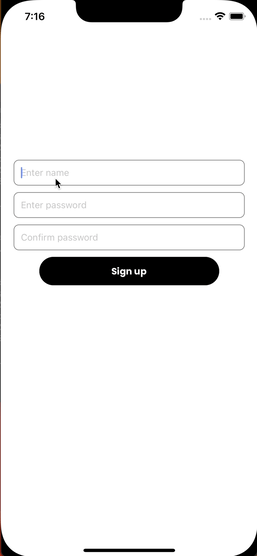
The only things missing right now are the error messages. So let's add them now. We will be showing an error message when the inputs are touched and have an error message or when we try submitting the form with some errors.
<TextInput
  placeholder="Enter name"
  value={values.name}
  onChangeText={handleChange("name")}
  onBlur={handleBlur("name")}
/>;
{
  touched?.name && errors.name && <Text>{errors.name}</Text>;
}
<TextInput
  placeholder="Enter password"
  value={values.password}
  onChangeText={handleChange("password")}
  onBlur={handleBlur("password")}
/>;
{
  touched?.password && errors.password && <Text>{errors.password}</Text>;
}
<TextInput
  placeholder="Confirm password"
  value={values.confirmPassword}
  onChangeText={handleChange("confirmPassword")}
  onBlur={handleBlur("confirmPassword")}
/>;
{
  touched?.confirmPassword && errors.confirmPassword && (
    <Text>{errors.confirmPassword}</Text>
  );
}
As everything is in place we have a working demo of a sign-up form with validations using Formik and Yup.
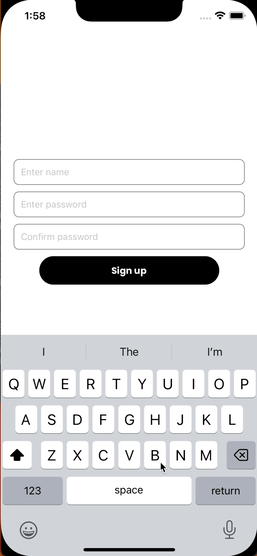
Here is the demo of everything working together:
Conclusion
By combining Formik and Yup, you can simplify form handling and validation in your React Native applications. Formik provides a convenient way to manage form state, while Yup offers a powerful validation library. Together, they can enhance your form development process and save you time and effort. Remember to refer to the official documentation of Formik and Yup for more detailed explanations and examples of their features. Happy coding!